On April 1, 2018, Cloudflare introduced the 1.1.1.1 DNS server which promises to be the internet’s fastest, privacy-first DNS resolver. At first, I thought this was one of those “mega” April Fool’s jokes but after reading a lot of opinions on it. I think it could be one of the best things that could happen this year.
So, what is the 1.1.1.1 by Cloudflare?
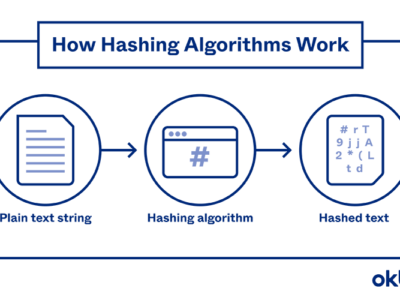
Nearly everything on the internet starts with a DNS request. Your coming to this blog started with a DNS request. DNS is the acronym for Domain Name System. Unfortunately, DNS by default is usually slow and insecure.
Your ISP, and anyone else listening in on the Internet can see every site you visit and every app you use — even if their content is encrypted. Creepily, some DNS providers sell data about your Internet activity or use it target you with ads. We think that’s gross. If you do too, now there’s an alternative: 1.1.1.1
What does 1.1.1.1 by Cloudflare promises?
Privacy first! Cloudflare guarantees that your data will never be sold or used to target ads towards you.
We will never log your IP address (the way other companies identify you). And we’re not just saying that. We’ve retained KPMG to audit our systems annually to ensure that we’re doing what we say. Frankly, we don’t want to know what you do on the Internet—it’s none of our business—and we’ve taken the technical steps to ensure we can’t.
Secondly, you browse faster than anything else. Cloudflare promises about 28% faster internet.
We’ve built 1.1.1.1 to be the Internet’s fastest DNS directory. Don’t take our word for it. The independent DNS monitor DNSPerf ranks 1.1.1.1 the fastest DNS service in the world.
Since nearly everything you do on the Internet starts with a DNS request, choosing the fastest DNS directory across all your devices will accelerate almost everything you do online.
Setting up 1.1.1.1 by Cloudflare
On iPhone
1. From your iPhone’s home screen, open the Settings app.
2. Tap Wi-Fi, then tap your preferred network in the list.
3. Tap Configure DNS, then tap Manual.
4. If there are any existing entries, tap the – button, and Delete next to each one.
5. Tap the + Add Server button, then type 1.1.1.1
6. Tap the + Add Server button again, then type 1.0.0.1. This is for redundancy.
7. Tap the Save button on the top right.
You’re all set!
On MacOS
1. Open System Preferences.
2. Search for DNS Servers and select it from the dropdown.
3. Click the + button to add a DNS Server and enter 1.1.1.1
4. Click + again and enter 1.0.0.1 (This is for redundancy.)
5. Click Ok, then click Apply.
You’re all set!
On Windows
1. Click on the Start menu, then click on Control Panel.
2. Click on Network and Internet.
3. Click on Change Adapter SeRight-clickong>.
4. Right click on the Wi-Fi network you are connected to, then click Properties.
5. Select Internet Protocol Version 4 (or Version 6 if desired).
6. Click Properties.
7. Write down any existing DNS server entries for future reference.
8. Click Use The Following DNS Server Addresses.
9. Replace those addresses with the 1.1.1.1 DNS addresses:
For IPv4: 1.1.1.1 and 1.0.0.1
For IPv6: 2606:4700:4700::1111 and 2606:4700:4700::1001
10. Click OK, then Close.
11. Restart your browser.
You’re all set!
On Android
Cloudflare advises that you configure your router instead because Android requires a static IP to use custom DNS servers. Which means, you would still require additional setup on your router.
On Router
1. Connect to your preferred wireless network.
2. Enter your router’s gateway IP address in your browser.
3. If prompted, fill in your username and password. This information may be labeled on the router.
4. In your router’s configuration page, locate the DNS server settings.
5. Write down any existing DNS server entries for future reference.
6. Replace those addresses with the 1.1.1.1 DNS addresses:
For IPv4: 1.1.1.1 and 1.0.0.1
For IPv6: 2606:4700:4700::1111 and 2606:4700:4700::1001
7. Save your settings, then restart your browser.
You’re all set!
On Linux (Ubuntu)
1. Click the Applications icon on the left menu bar.
2. Click Settings, then Network.
3. Find your internet connection on the right pane, then click the gear icon.
4. Click the IPv4 or IPv6 tab to view your DNS settings.
5. Set the “Automatic” toggle on the DNS entry to Off.
Provide the 1.1.1.1 DNS addresses in the DNS entries field:
1.0.0.1
For IPv6: 2606:4700:4700::1111,2606:4700:4700::1001
6. Click Apply, then restart your browser.
You’re all set!
1.1.1.1 is a partnership between Cloudflare and APNIC.
Cloudflare runs one of the world’s largest, fastest networks. APNIC is a non-profit organization managing IP address allocation for the Asia Pacific and Oceania regions. Both of were motivated by a mission to help build a better Internet. You can read more about each organization’s motivations on their respective posts: Cloudflare Blog / APNIC Blog.